All expatriates and citizens are requested to enroll their biometrics as part of the process for enhanced security and identity verification. During this process, both of your handsprings will be scanned, an iris scan (eye scan) will be conducted, a photo of your face will be taken, and your signature will be recorded digitally.
Follow these steps to book your appointment online:
Start by visiting the official Meta website where biometric enrollment appointments are scheduled. Click here (Visit Meta) to navigate to the site directly. Ensure you have a stable internet connection.
- Step 1: Login to your Meta account. (If you already have an account registered)You will need to enter your Civil ID and Password in the respective fields.
Click on the ‘Login’ button.
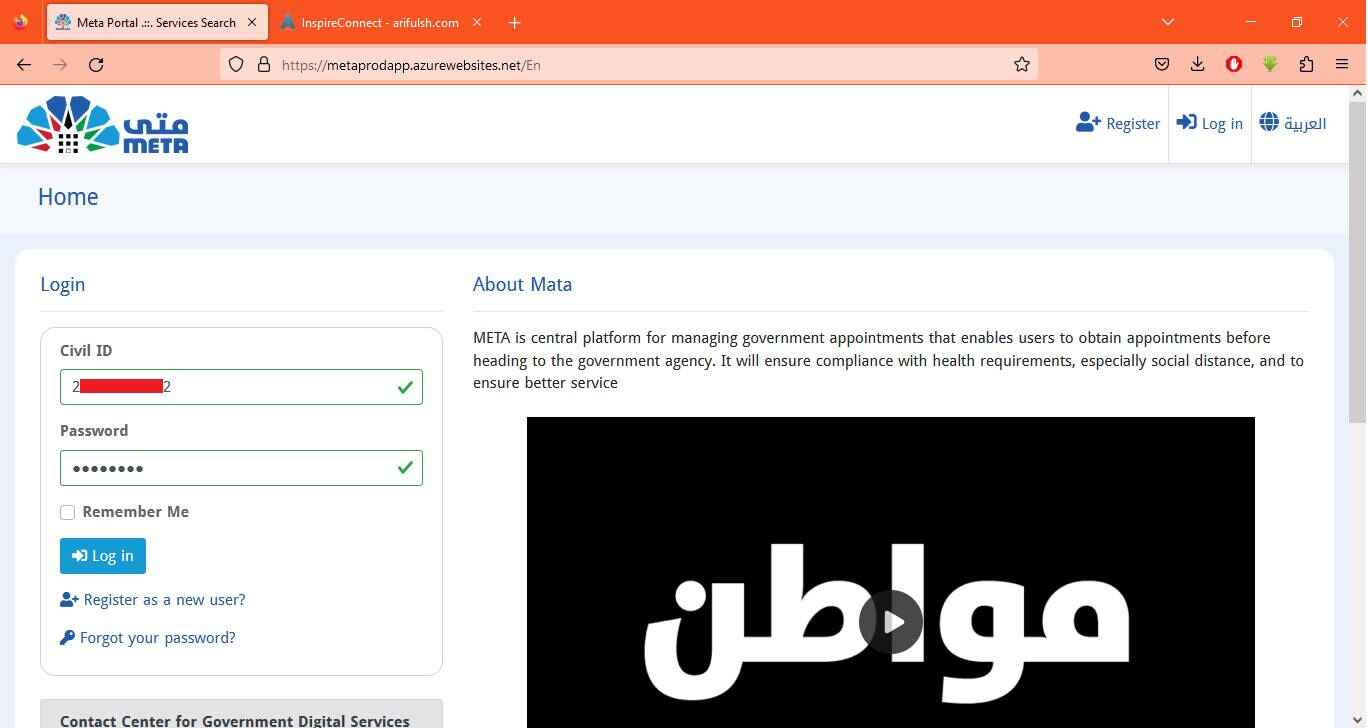
Login Meta
- Step 2: Access the Appointment booking sectionAfter logging in, the dashboard will open then find and click Appointment Search from the ‘Menu’ button, usually found on the top left side of the page. For Mobile Users: Select ‘Appointment Search’ from the drop-down. This will take you to a new page where various appointments can be scheduled.
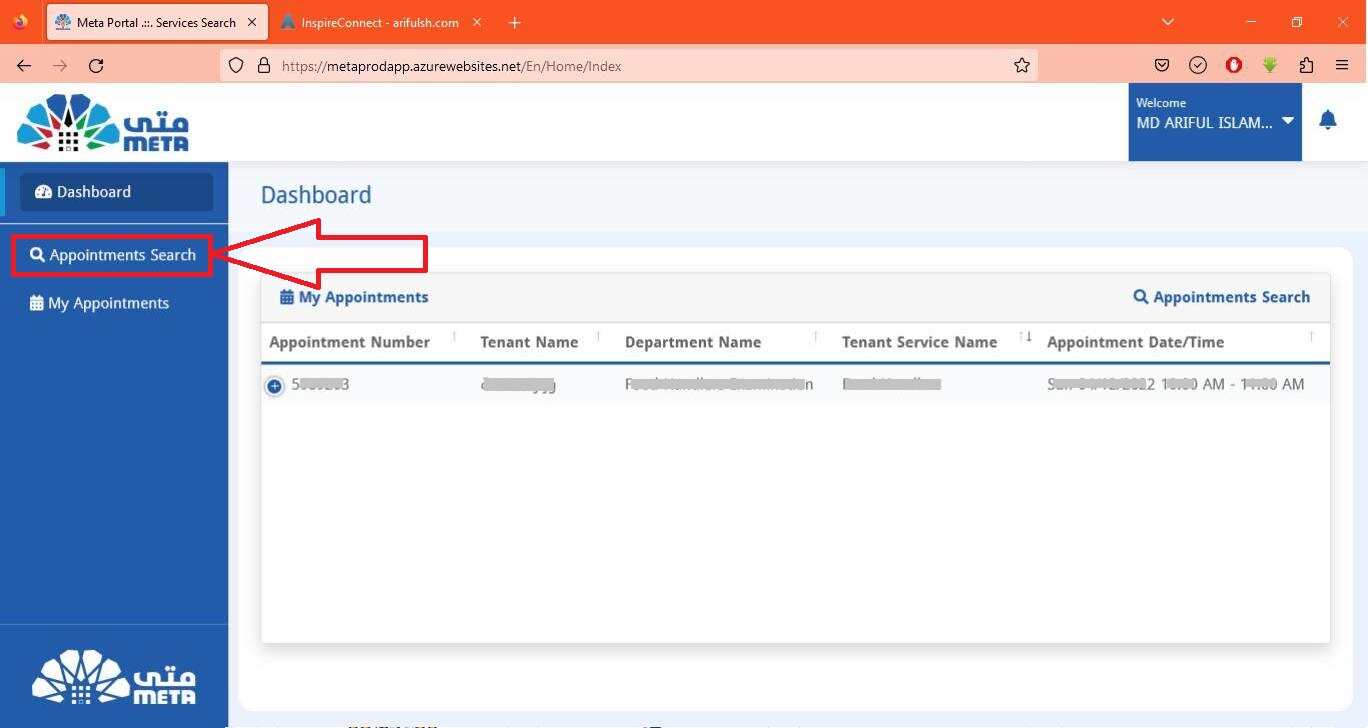
Appointment booking section
- Step 3: Select Ministry of Interior services.On the ‘Appointment Search’ page, scroll down until you find ‘Ministry of Interior’. Click on it, then click on the ‘Service Category’ that appears.
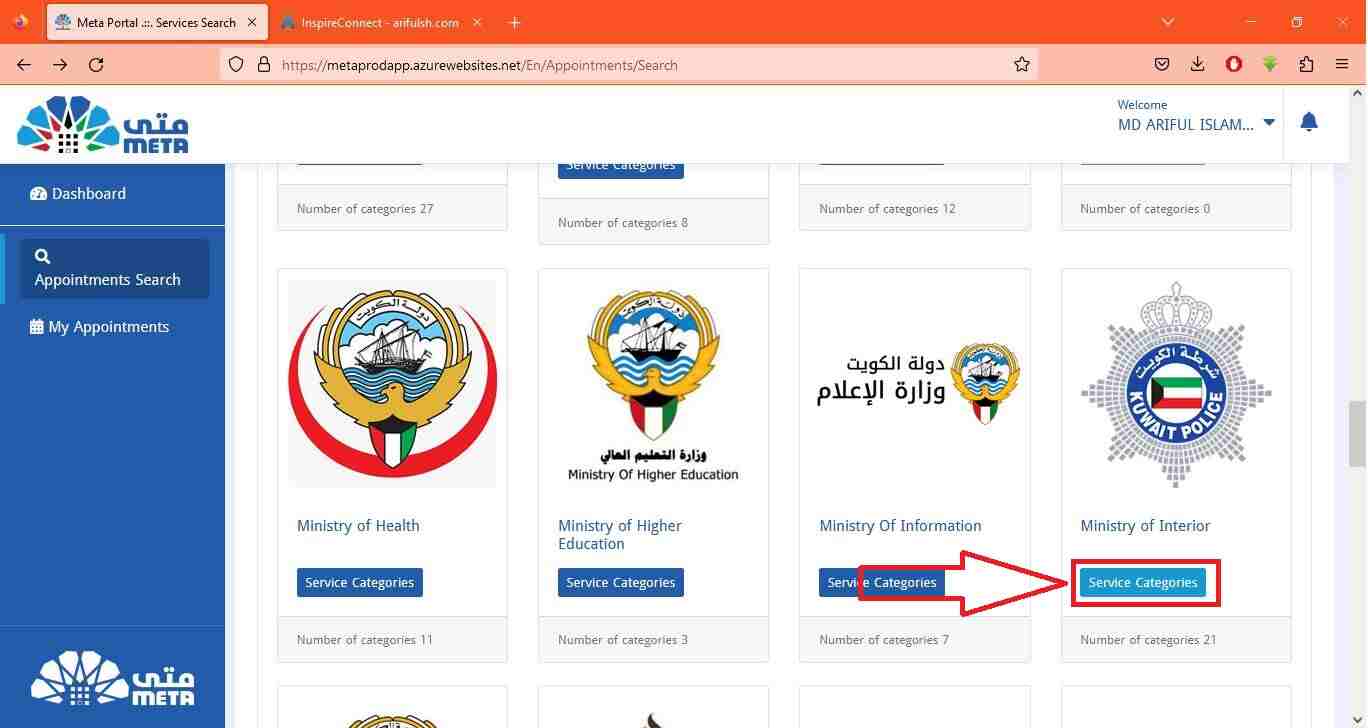
Select Ministry of Interior services
- Step 4: Choose the General Department of Personal Identification.Continue scrolling down until you find the ‘General Department of Personal Identification’. Click on it, then click on the ‘Services’ that appears.
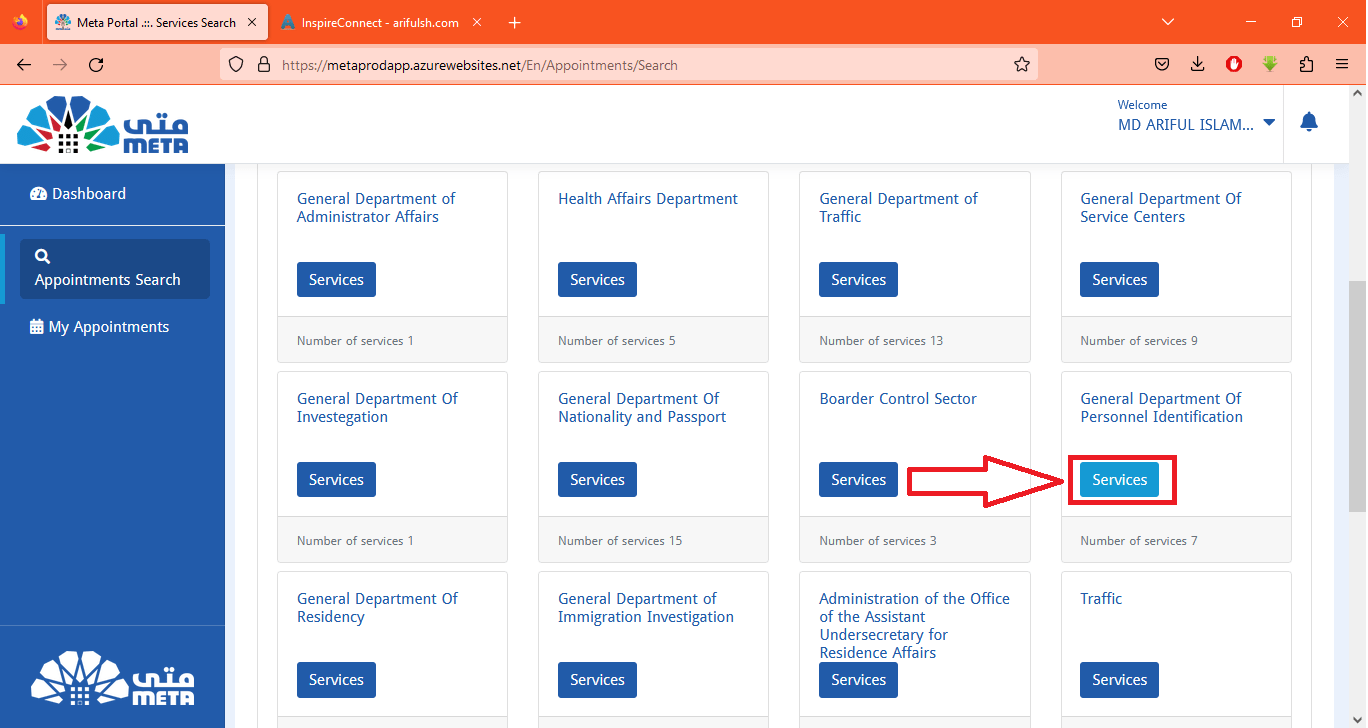
Choose the General Department of Personal Identification
- Step 5: Find and Apply for Biometric Enrollment.Keep scrolling until you find ‘Biometric Enrollment’. On the right side of this option, you’ll find an ‘Apply’ button. Click on it to proceed with the appointment booking.
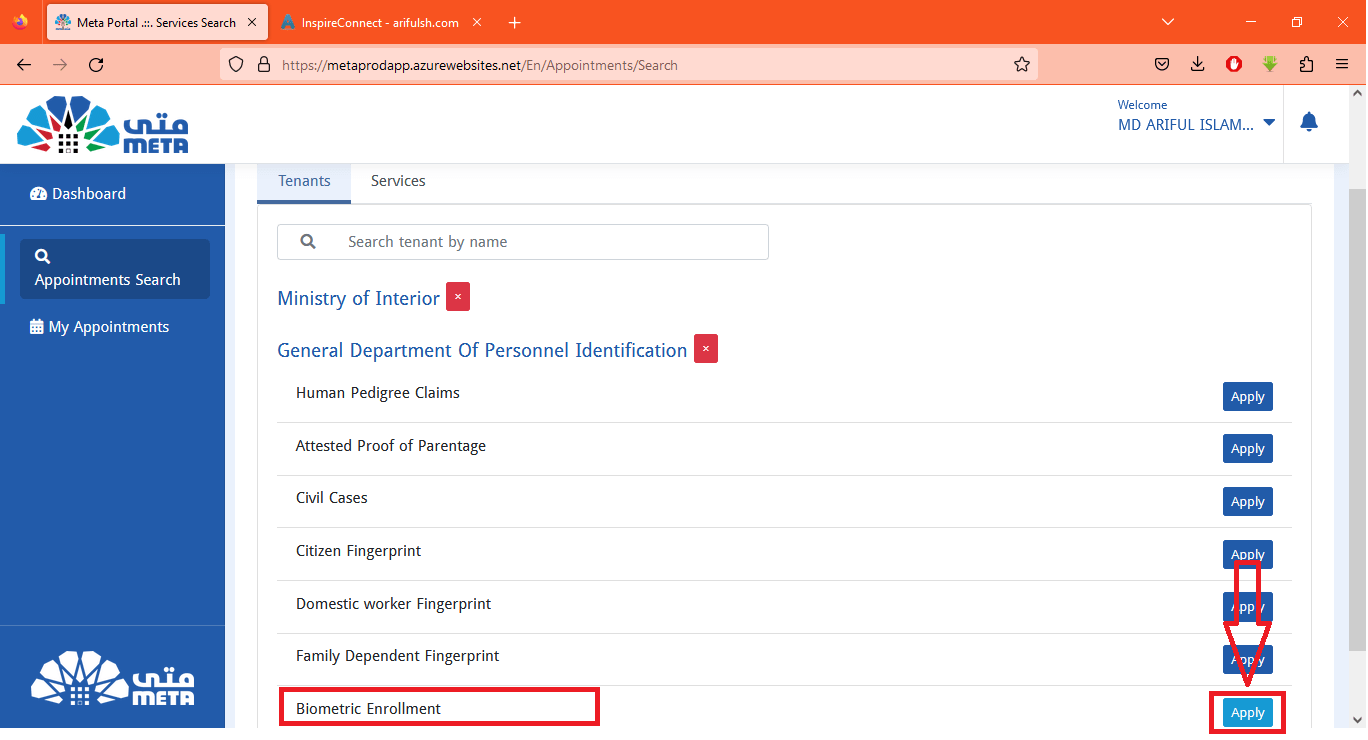
Apply for Biometric Enrollment
- Step 6: Select your Preferred Location.On the biometric enrollment page, you will be presented with various location options. Choose the most convenient location for you.
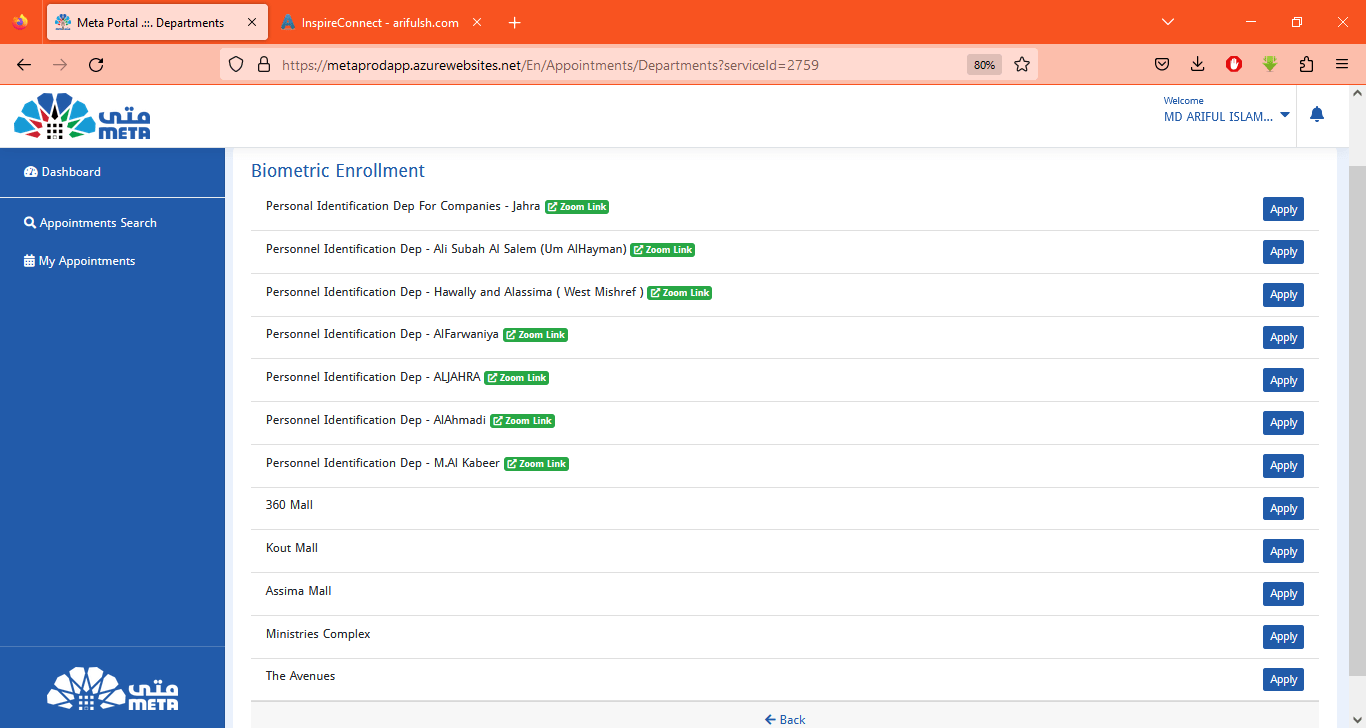
Select your Preferred Location.
- Step 7: Choose Date and Time.After selecting your preferred location, you can choose a convenient date and time for your appointment.
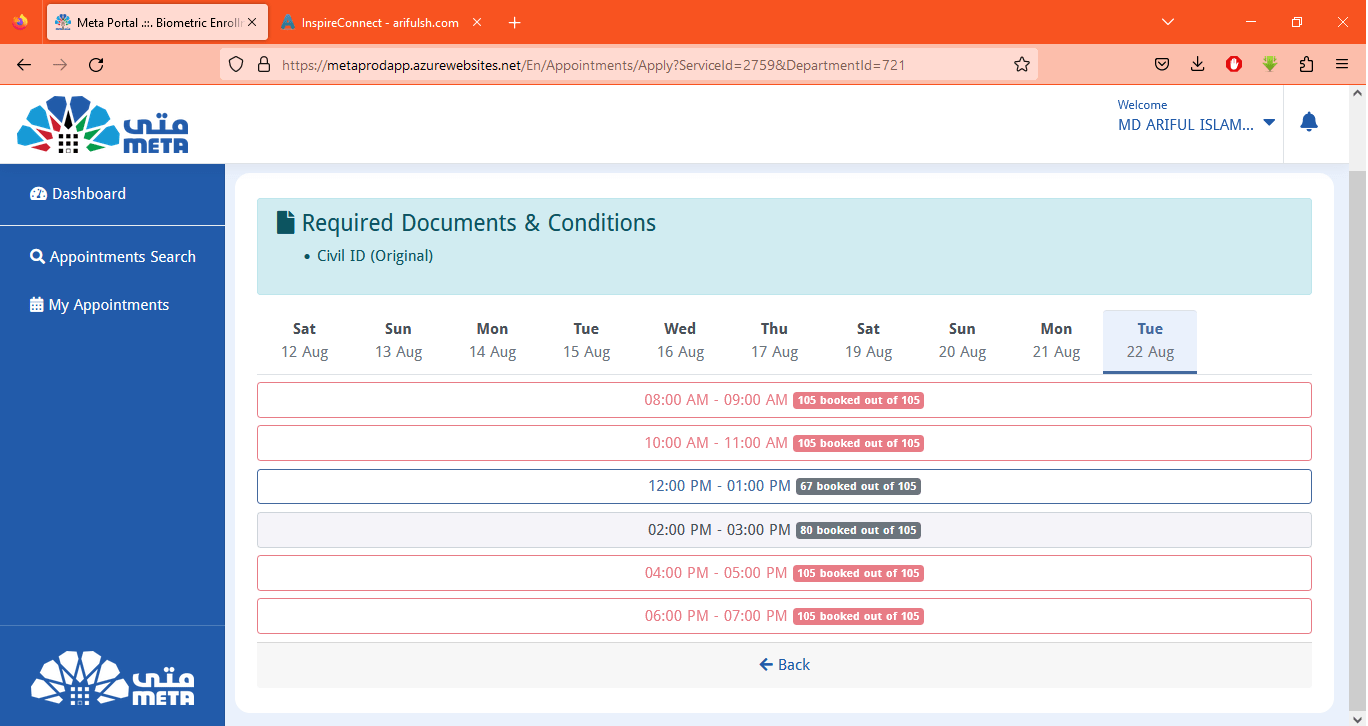
Choose Date and Time.
- Step 8: Review and Confirm
Make sure you choose a deadline that doesn’t conflict with your other commitments. Review all the information you entered and then confirm your appointment. Then click on the ‘Yes‘ button that appears as a pop-up at the top of the page.
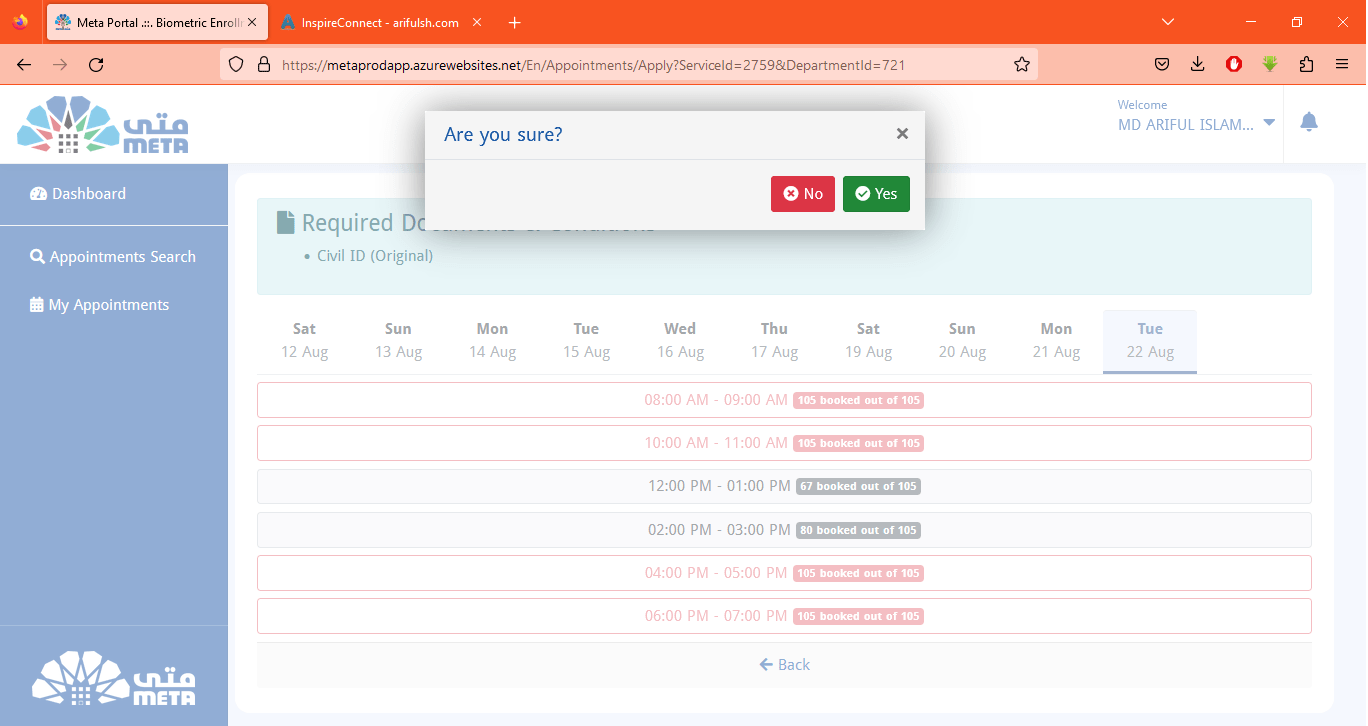
Review and Confirm
- Step 9: Confirmation of Appointment.
Once this step is completed you will receive a confirmation. Take a screenshot and save the QR code or print it to show when visiting the location.
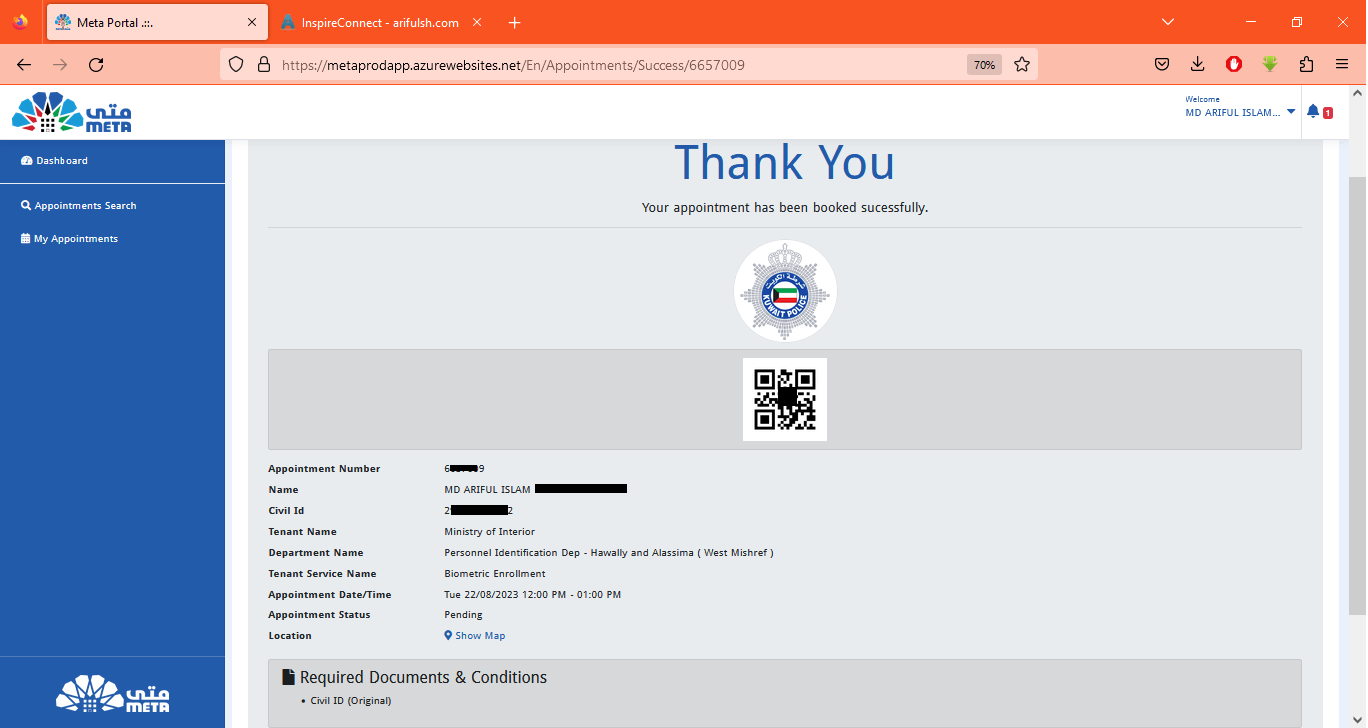
Confirmation of Appointment.
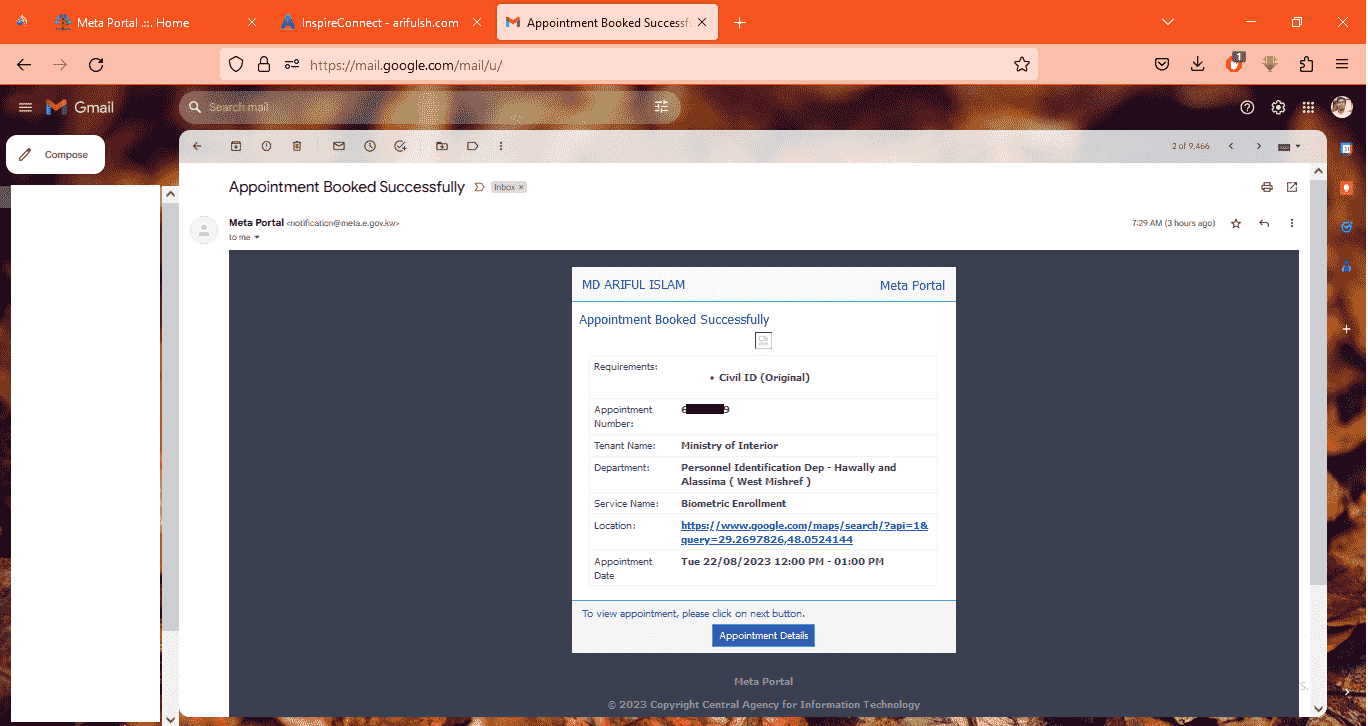
Confirmation Email
Note: Please visit the location only after getting the appointment confirmation message, when you book the appointment almost everyone is getting the appointment as pending. This means you should wait for confirmation, it heard only Kuwaitis are getting confirmation sms, some expats come back because their appointment status is still pending.
It is very important to carry your Civil ID to the appointment.
Passengers are allowed to enter the airport without being fingerprinted, but it’s always good to be prepared. so early planning is encouraged.
Remember to use the Meta platform for seamless and advance appointment bookings.
Enjoy your smooth and hassle-free biometric enrollment process!
Thank you.

